Jump to section
Metaobject Data Manager for Shopify
User Guide
Introduction
Metaobject Manager is a versatile Shopify app designed to simplify the management of custom metaobject data in your Shopify store. With this app, Shopify admins can easily export, update, and add metaobject data using Excel, then seamlessly reimport it back into their store. Whether you're looking to streamline your data workflows or keep your store information accurate and up to date, Metaobject Manager is the perfect solution.
Metaobject manager currently supports exporting and importing of the following Shopify metaobject field types:
- Single line of text
- Multiple lines of text
- Integer
- Decimal
- Product
- File
- Date and Time
- Date
- Dimension
- Volume
- Weight
- True or False
- Rating
- URL
- Money
- Link
- Product (relationship)
- File (relationship)
- Image (relationship)
Click here to jump to the Supported field types section for more information.
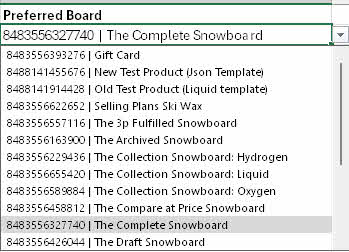
Relationship data is managed within Excel via dropdowns making it easy to reliably create relationships between metaobjects and store data. Below is an example of a product relationship named Preferred Board:
Installation
Installing the Metaobject Manager app on your Shopify store is straightforward and can be completed in a few steps:
- Go to the Shopify App Store and search for "Henmo Ecom: Metaobject Manager".
- Click on the app and select "Install".
- Log in to your Shopify account if prompted.
-
Review the app permissions and click "Install".
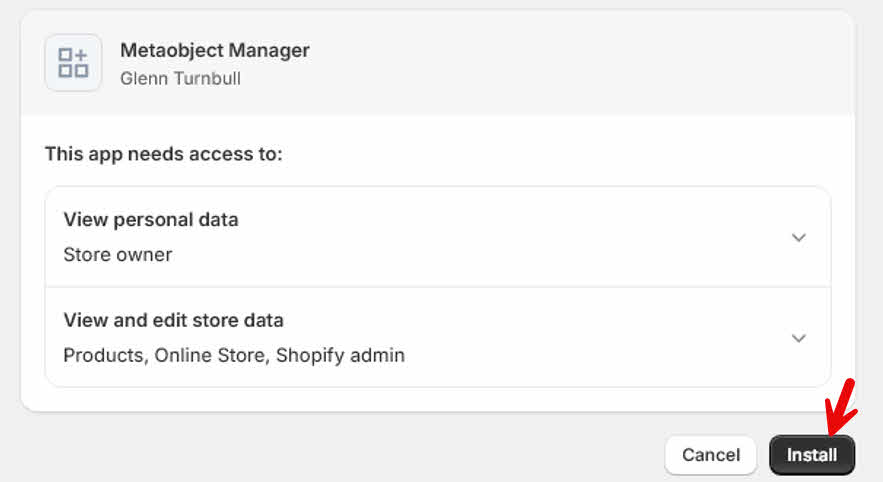
Click here to our privacy policy which provides more information about the data this app needs access to.
-
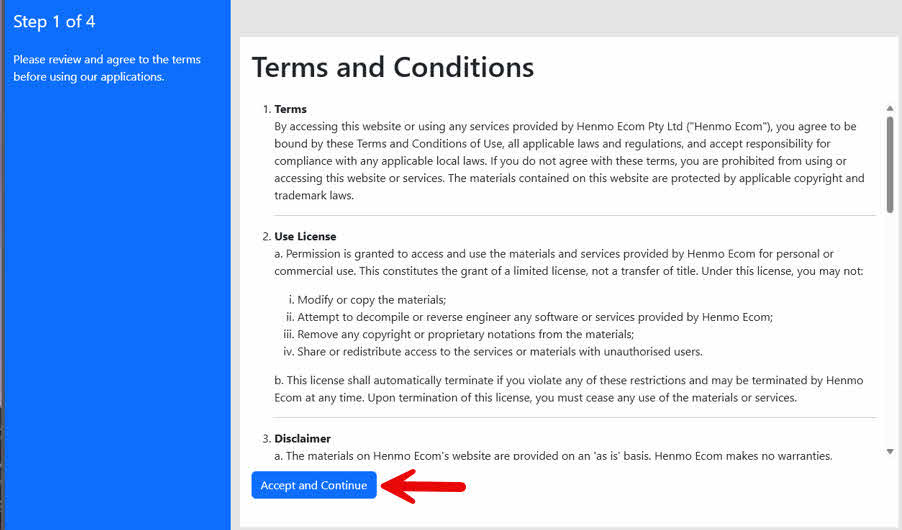
Read and accept the terms and conditions
- Choose your preferred subscription option
- Review the subscription and click Approve
-
Answer (or skip) the survey question

-
Skip or submit your email to join our monthly newsletter

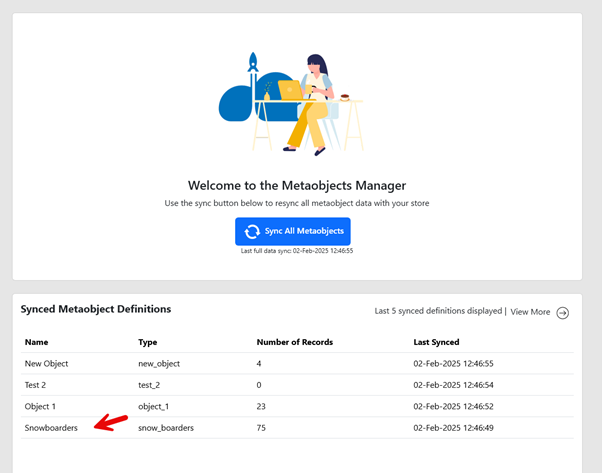
Once the installation is complete the app will immediately start syncing your current metaobject definitions and data. The grids will automatically refresh once the sync is complete, note this process can take a few minutes.

Don't worry if you have not set up metaobjects in Shopify yet, you can always resync this data at any time (see Syncing Data below).
Managing Metaobject Data
At a high-level the follow these steps to manage metaobject data using this app:
- Create the metaobject structure in the Shopify Admin console.
- Sync the metaobject definitions and data with the App
- Export the data (if no data exists, a blank template will be created).
- Update the data in Microsoft Excel.
- Import the updated data back into Shopify.
For instructions on creating the metaobject structure in Shopify, refer to the Building a Metaobject section of the Shopify manual.
Once the metaobject structure is set up in Shopify, you can export it to generate an Excel template. After updating the template with new or modified data, use the import function to upload the changes to your store.
The sections below will take you through the export, Excel data manipulation and import processes.
Supported Field Types
This app supports the following "one value" metaobject relationships:
- Products
- Files
- Images
Note: Updating "list of" relationships is not supported at this time.
The following "one value" field types are supported:
- Single line of text
- Multiple lines of text
- Integer
- Decimal
- Product
- File
- Date and Time
- Date
- Dimension
- Volume
- Weight
- True or False
- Rating
- URL
- Money
- Link
The following "list of values" field types are supported:
- Single line of text with a predefined choices
Note: All other "list of values" field types are not supported at this point in time.
Please contact us at support@henmoecom.com if you need support for additional field types, we'd gladly look into your request.
Supported Field Validations
This app supports the following field validations:
- Required
- Regular expression
- Predefined choices (single line of text)
- Minimum and maximum values
- Minimum and maximum character counts
- Minimum and maximum dates
- Maximum decimal places
Exporting Data
Exporting metaobjects from your Shopify store is equally simple and useful for obtaining a new Excel template to add / update data or creating a back up of this information.
- Open the Metaobject Manager app from your Shopify Admin dashboard.
-
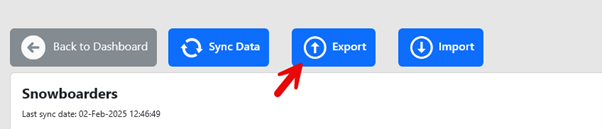
Click on the metaobject definition you wish to Export.
In the example below we are exporting the Snowboarders metaobject.
Note: If you have more than five metaobject definitions and don’t see a specific definition in the dashboard list, click the "View More" link at the top of the grid to display the full list.
-
Click "Export" and click Close on the export job notification
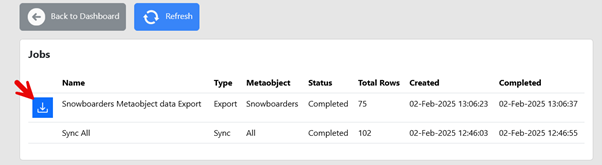
You will be taken to the Jobs grid where the export process can be monitored by clicking the Refresh button at the top of the grid:

-
Once the job is complete the file can be downloaded by clicking the Download icon on the left of the row.
If there is an error, click anywhere on the job row to open the job and view more information on the issue.
Using the Excel Template
The excel file downloaded from the export will contain all the fields from the metaobject definition you exported, including any relationships to other products and/ or files.
When initially opening an exported Excel file, it may be in Protected View and the sheet will be read-only. Click the "Enable Editing" button to enable updates to the data:

Update or add data to this file as needed. Note: column A is hidden and not to be updated. It contains internal IDs used for updating existing metaobject data and manually updating this data can lead to errors or unexpected results.
Special field types
-
Relationships
Relationship data is managed within Excel via dropdowns making it easy to reliably create relationships between metaobjects and store data:
-
Dimension
Dimension fields contain two elements, a numeric (decimal) value and the unit.
For example: 2.3 INCHESWe have written logic into the import to also handle abbreviations for your convenience.
For example: 2.3 inBelow is a list of all valid dimension units:
- INCHES
- FEET
- CENTIMETERS
- MILLIMETERS
- METERS
- YARDS
-
Volume
Volume fields contain two elements, a numeric (decimal) value and the unit of measure.
For example: 10.6 GALLONSWe have written logic into the import to also handle abbreviations for your convenience.
For example: 2.3 galBelow is a list of all valid volume units:
- MILLILITERS
- LITERS
- CENTILITERS
- CUBIC_METERS
- FLUID_OUNCES
- PINTS
- QUARTS
- GALLONS
- IMPERIAL_FLUID_OUNCES
- IMPERIAL_PINTS
- IMPERIAL_QUARTS
- IMPERIAL_GALLONS
-
Weight
Weight fields contain two elements, a numeric (decimal) value and the unit of measure.
For example: 8.6 POUNDSWe have written logic into the import to also handle abbreviations for your convenience.
For example: 8.6 lbsBelow is a list of all valid weight units:
- OUNCES
- POUNDS
- GRAMS
- KILOGRAMS
Importing Data
The import feature of Metaobject Manager allows you to import a modified template back into your store. This data is loaded directly into your Shopify store and then automatically resynced to the Metaobject Manager app for review.
- Navigate to the Metaobject Manager app within your Shopify admin dashboard.
-
Click the metaobject definition you wish to Import.
In the example below we are importing data for the Snowboarders metaobject.
Note: If you have more than five metaobject definitions and don’t see a specific definition in the dashboard list, click the "View More" link at the top of the grid to display the full list.
-
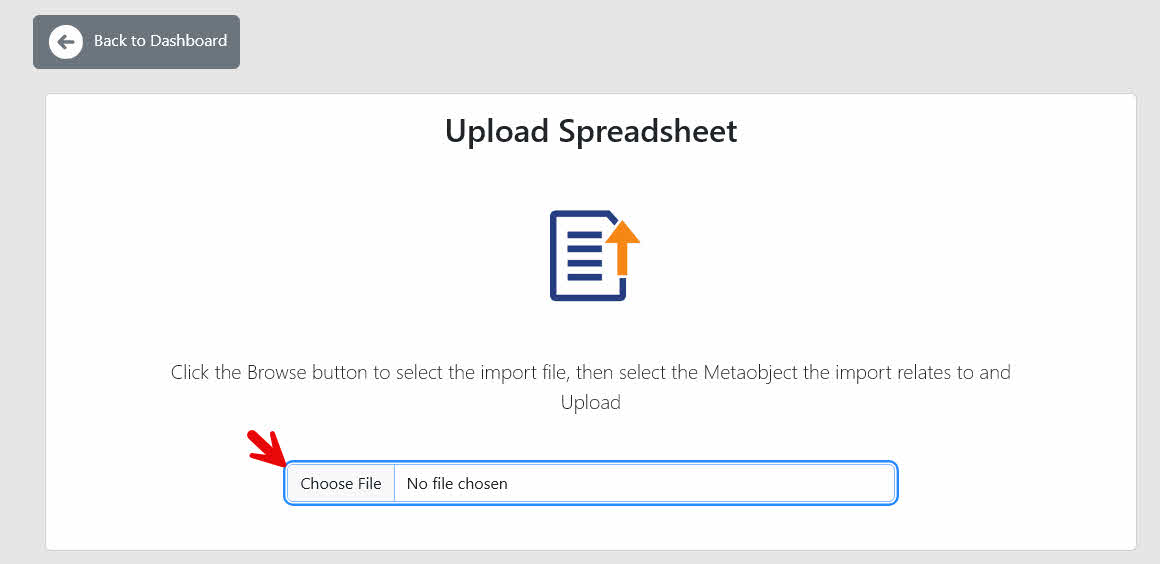
Click the "Import" button

-
Click “Choose file” to select the Microsoft Excel template from your machine
-
Ensure the correct metaobject is selected in the dropdown (it should match the template data) and click Upload
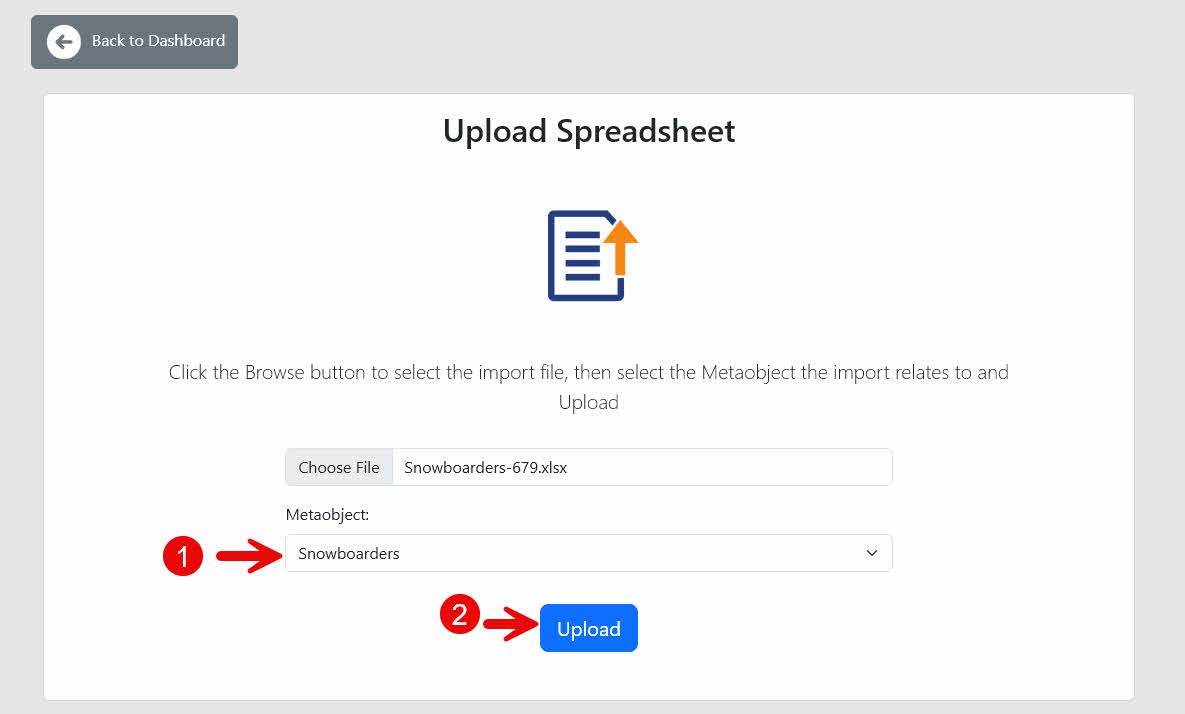
- Click close on the Import job creation notification
-
Click the job grid's Refresh button to check the status of the import.
-
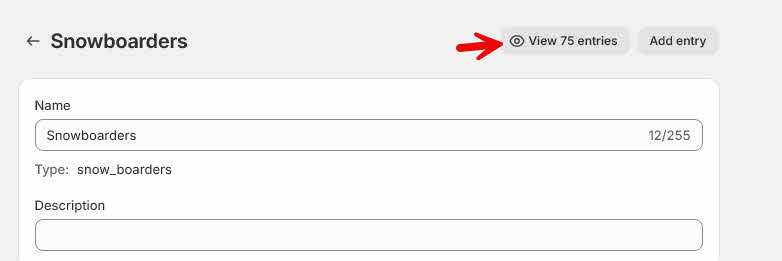
Once the import is complete, you can confirm these changes have been made in your Shopify Admin portal by navigating to Custom Data, selecting the relevant metaobject and clicking the View X entries button in the top left corner.
 You can also view the data in the Metaobject Manager app by click "Back to Dashboard" and selecting the imported metaobject definition to view its data.
Note: If you're importing new data, be sure to export the updated data for any future changes—don't reuse the original import file. The initial file lacks the necessary record IDs for updates and will create duplicate records if re-imported.
Troubleshooting Import Errors
Before importing, the system will verify, parse, and transform the data to ensure accuracy and consistency. During this process, it checks for errors, missing fields, and formatting issues, applies necessary transformations, and enforces all rules configured on the metaobject. This ensures that only valid data is imported while maintaining data integrity and compliance with the defined structure.
If an issue is detected in the import file, the job status will be set to either 'Failed' or 'Partially Completed,' depending on the severity and impact of the error.
If this occurs, click on the job to open its details, where you can review specific error messages, identify the problematic data, and take corrective action before reattempting the import.
The image below provides an example of a failed import job. This job was unable to parse the file due to invalid data. In the bottom section, you’ll find detailed error information, including the row number, field name, and a description of the issue detected during processing.
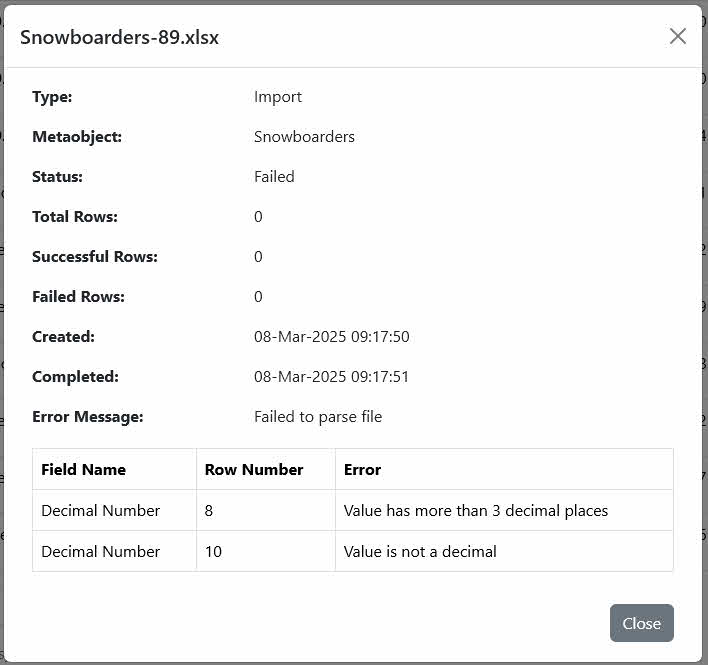
In this instance, the action would be to correct the data within the column named "Decimal Number" on rows 8 & 10, then re-import the file.
If you experience ongoing issues, please log a support ticket and we'd be happy to assist.
Syncing Data
You can manually sync metaobject data from your Shopify store to the App at any time. This is useful if changes have been made to the metaobject definition in Shopify. You can either sync all data and definitions or choose to sync a specific metaobject definition:
Sync All
- Navigate to the Metaobject Manager app within your Shopify admin dashboard.
-
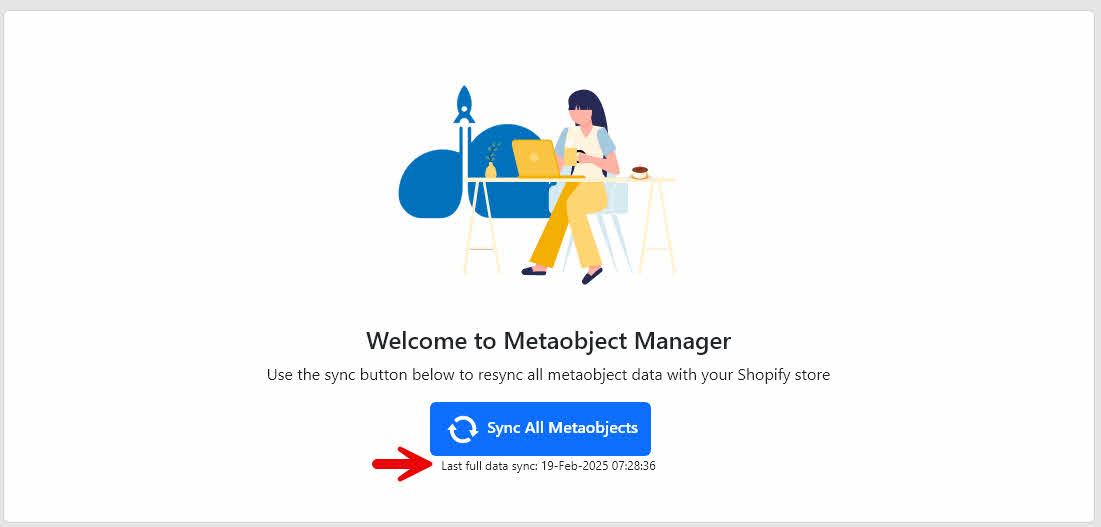
Click Sync All Metaobjects button

-
Click Close on the job notification to return to the dashboard or "Go To Jobs Page" to view the job and its current progress.
-
The dashboard will show a sync message and will automatically refresh when the sync is finished.

-
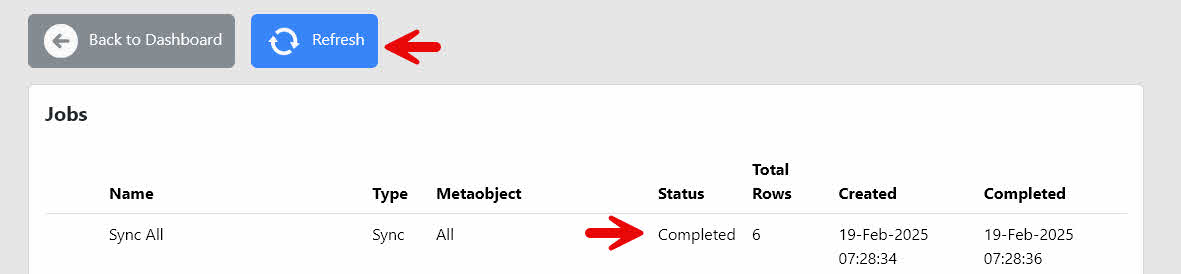
If you choose to go to the job page, use the refresh button to monitor the job status
-
The dashboard will show a sync message and will automatically refresh when the sync is finished.
Sync a single Metaobject
- Navigate to the Metaobject Manager app within your Shopify admin dashboard.
- Open the metaobject from the metaobject definition grid
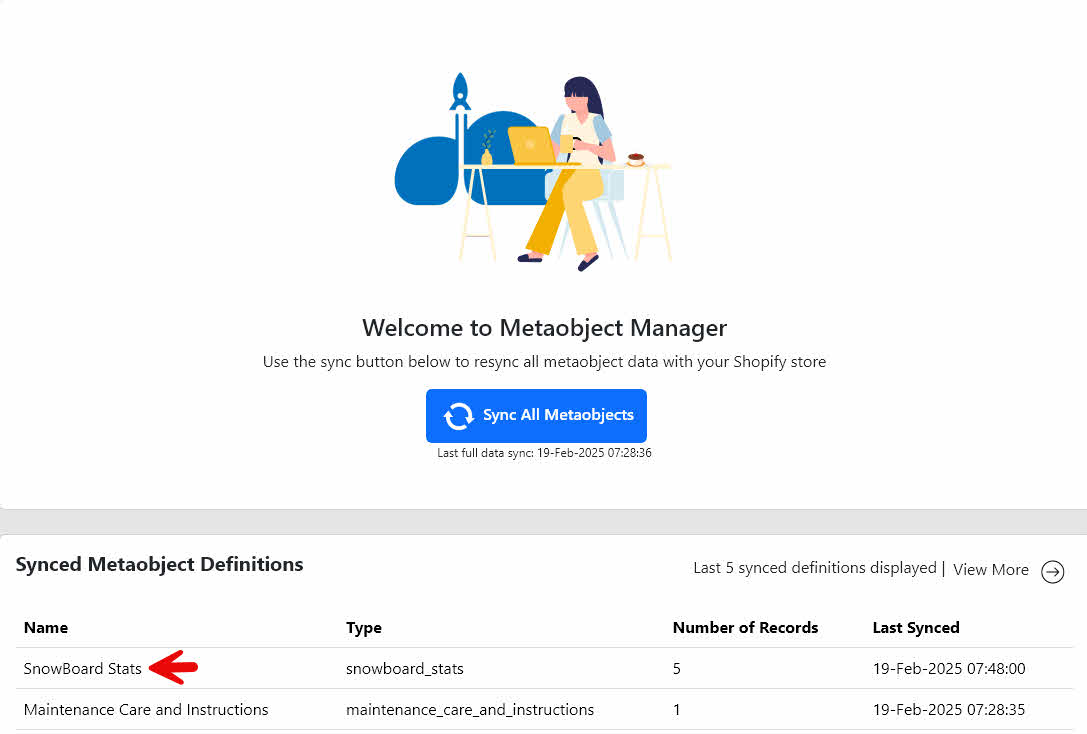
- Click the Sync Data button

- Click Close on the job notification to return to the metaobject or "Go To Jobs Page" to view the job and its current progress
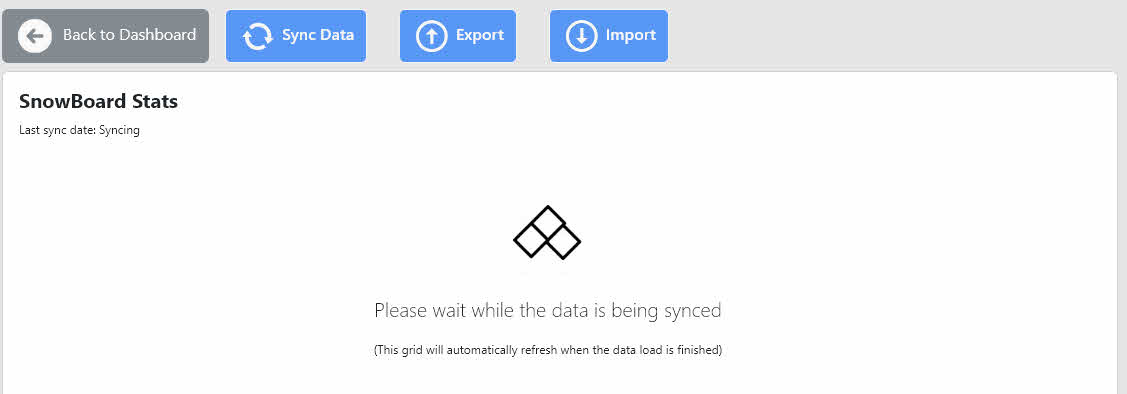
-
If you clicked close, the grid will display a syncing message and will automatically display the refreshed data when it finishes
-
If you choose to go to the job page, use the refresh button to monitor the job status
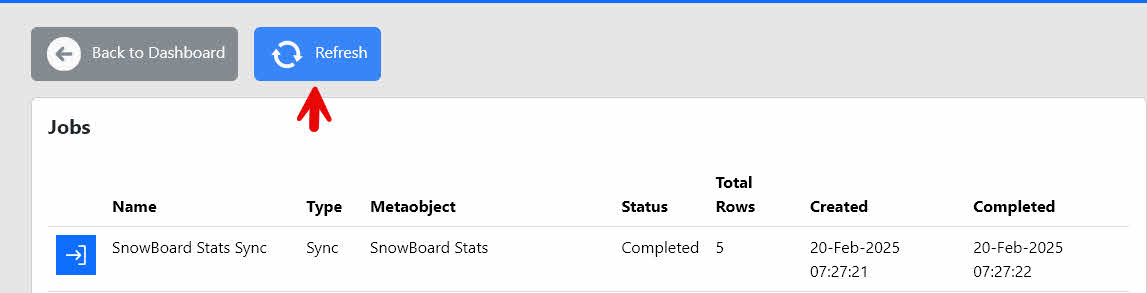 Note clicking the button next to the name will open the refreshed metaobject data.
-
If you clicked close, the grid will display a syncing message and will automatically display the refreshed data when it finishes
The metaobject grid will automatically refresh once the sync is complete and the last sync date will also be updated.